
Segments & Jobs
The top two bands: who the work is for, what needs doing, and the links that wire them together
From a Segment Down to Its Jobs
The Segmentation band is an ordered rail of segment cards. A segment can break down into sub-segments, drawn one row beneath it, and each segment or sub-segment links down to the jobs it performs or needs done. The Jobs band holds those job cards wherever you drop them.
Segments themselves — types, tags, descriptions, attachments — are managed like any other record; see Managing Your Data. Jobs live only here.
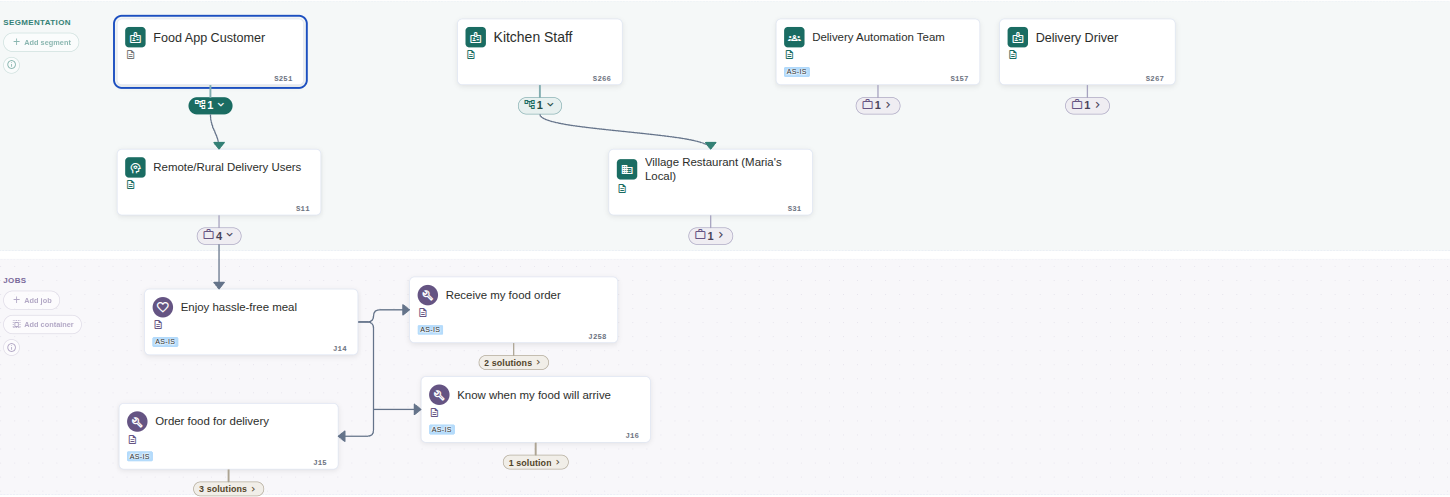
A segment selected as a track: the sub-segment beneath it, and the four jobs its connection box counts. (Click to zoom)
Drawing Links Between Cards
Drag from a card's edge to another card to link them: a segment to a job, a segment to its sub-segments, or a job to a job it splits into. Links save immediately and are visible to everyone.
- Every link is directed, arrowhead on the band-downward end: a segment points at its sub-segments and jobs, a job at its sub-jobs
- Lines to jobs read like a tree. One trunk drops from the segment and each job hangs off it on a short branch into its side: jobs left of the trunk are entered from the right, jobs right of it from the left. A job with sub-jobs sends its own trunk out of its other side
- Hover a line to see its ✕ and remove that link. Drawing and removing both show an Undo button for about ten seconds (Ctrl+Z presses it), and the line follows the undo at once
- Duplicates are refused. A link that already exists, in either direction, shows a short message and changes nothing
- Linking a job to a segment whose track is not on screen selects that track, so the new line is visible
Added or dropped cards settle beside a trunk rather than on it, so tightly packed jobs still show where every line goes.
Connection Boxes Under Cards
Each kind of connection leaving a card gets its own small box below it, counting what sits one level down. A segment with sub-segments and jobs of its own shows two boxes, each with its own glyph and number; a job shows one box for its solutions. Every line leaves the card through the box that counts it.
Click a box to open or hide what it counts
Collapsing a segment's jobs box hides only the jobs it counts; its sub-segments stay. Collapsing the sub-segments box hides them and everything reachable only through them. The chevron shows whether a box is open, and collapses are remembered between visits. A collapse never touches the Solutions rail: a linked solution whose job you collapsed keeps its strip and its line, and opening that strip brings the job back.
A box is not a filter
Clicking a box never changes which tracks are selected; that is the card itself. One exception: opening the jobs box of a segment whose track is off screen adds that track, since otherwise there would be nothing to show. Nor will the filtered board match the numbers: a box counts one level down through one kind of connection, a track follows connections all the way down.
A count past two digits reads 99+ in the box; the true number stays in its tooltip.
What a Card Tells You
Cards keep the same size and stay readable at every zoom. Name, type and tags are always there; the rest is a row of small indicators and badges:
Description indicator
The description never takes up card space. Hover its small document glyph to read it in full; the tooltip wraps to stay on screen at any zoom.
Opportunity badge
A card with at least one linked opportunity carries a ! badge with the count. Hover it to list them, click it to manage them — see Marking Opportunities on the Canvas below.
ID badge
Bottom-right, every card carries its short ID: S251 for a segment, J14 for a job. Hover the card for a copy button. Paste an ID into search to jump to that card, or send it to a colleague — see Tracks, Search & Sharing.
Hover controls
Hover any card and its controls appear above it at any zoom: view (the eye), edit and delete, plus hiring decisions on a job card, which opens that job's timeline over the canvas (see Hiring Decisions). The eye, or a double-click, opens a read-only panel with the full record and an Edit button that leads to the form.
Types are yours. A segment card's glyph and type caption come from your workspace's own object-type catalog — team, role, persona, customer or whatever you have defined. See Object Types.
Marking Opportunities on the Canvas
An opportunity is a gap or an idea that hasn't been acted on yet — "drone delivery for short-range orders". Link it to the segment or job it affects and the card shows it, so the open questions sit next to the work they concern.
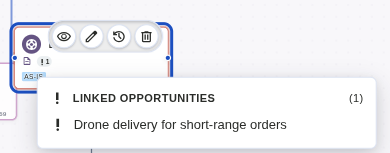
The ! badge on a job card, hovered. (Click to zoom)
Linking the first one
The badge only appears once a card has a linked opportunity, so the first link is made from a form: open the segment's or job's edit form and add it in the Links panel, add it from the solution's form, or name it on a hiring decision. The Opportunities page in the main menu links from the other end.
Managing them from the card
Hover the badge to list the linked opportunities by name. Click it to open the Linked items dialog: each opportunity is a chip with a view button and a ✕ to unlink it, and + Add opens a picker to link existing opportunities or create a new one on the spot. The count is live — a colleague linking an opportunity updates your badge.
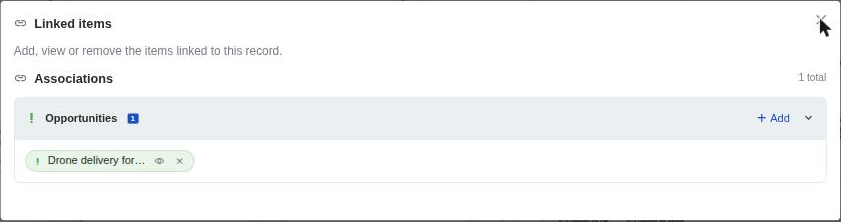
Click the badge: the dialog to view, unlink and add. (Click to zoom)
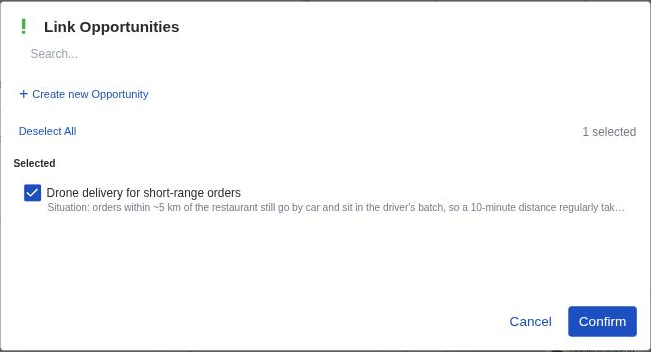
+ Add: pick existing opportunities or create a new one. (Click to zoom)
Wiring Up a New Segment
- Add segment in the Segmentation gutter (or right-click the band). Pick its type — team, role, persona, customer — and name it
- If it breaks down further, add the sub-segments the same way and drag a link from the parent's edge to each. They drop into the row beneath
- Add its jobs with Add job and drag a link from the segment (or sub-segment) to each job
- Drag the job cards into a sensible layout; a container frames a cluster if it helps
- Click the segment card to check its track: only what it reaches stays on the board. Anything missing is a link you haven't drawn yet