
Object Types
Customize entity schemas with custom types, icons, and visibility settings
Configuring Object Types
Object Types define the schema for entities in RoleDream. Customize which types are available in each category, set custom icons, add descriptions, and hide unused types to keep your workspace organized.
Access Object Types configuration from Settings → Object Types. Changes apply immediately across all entity browsers.
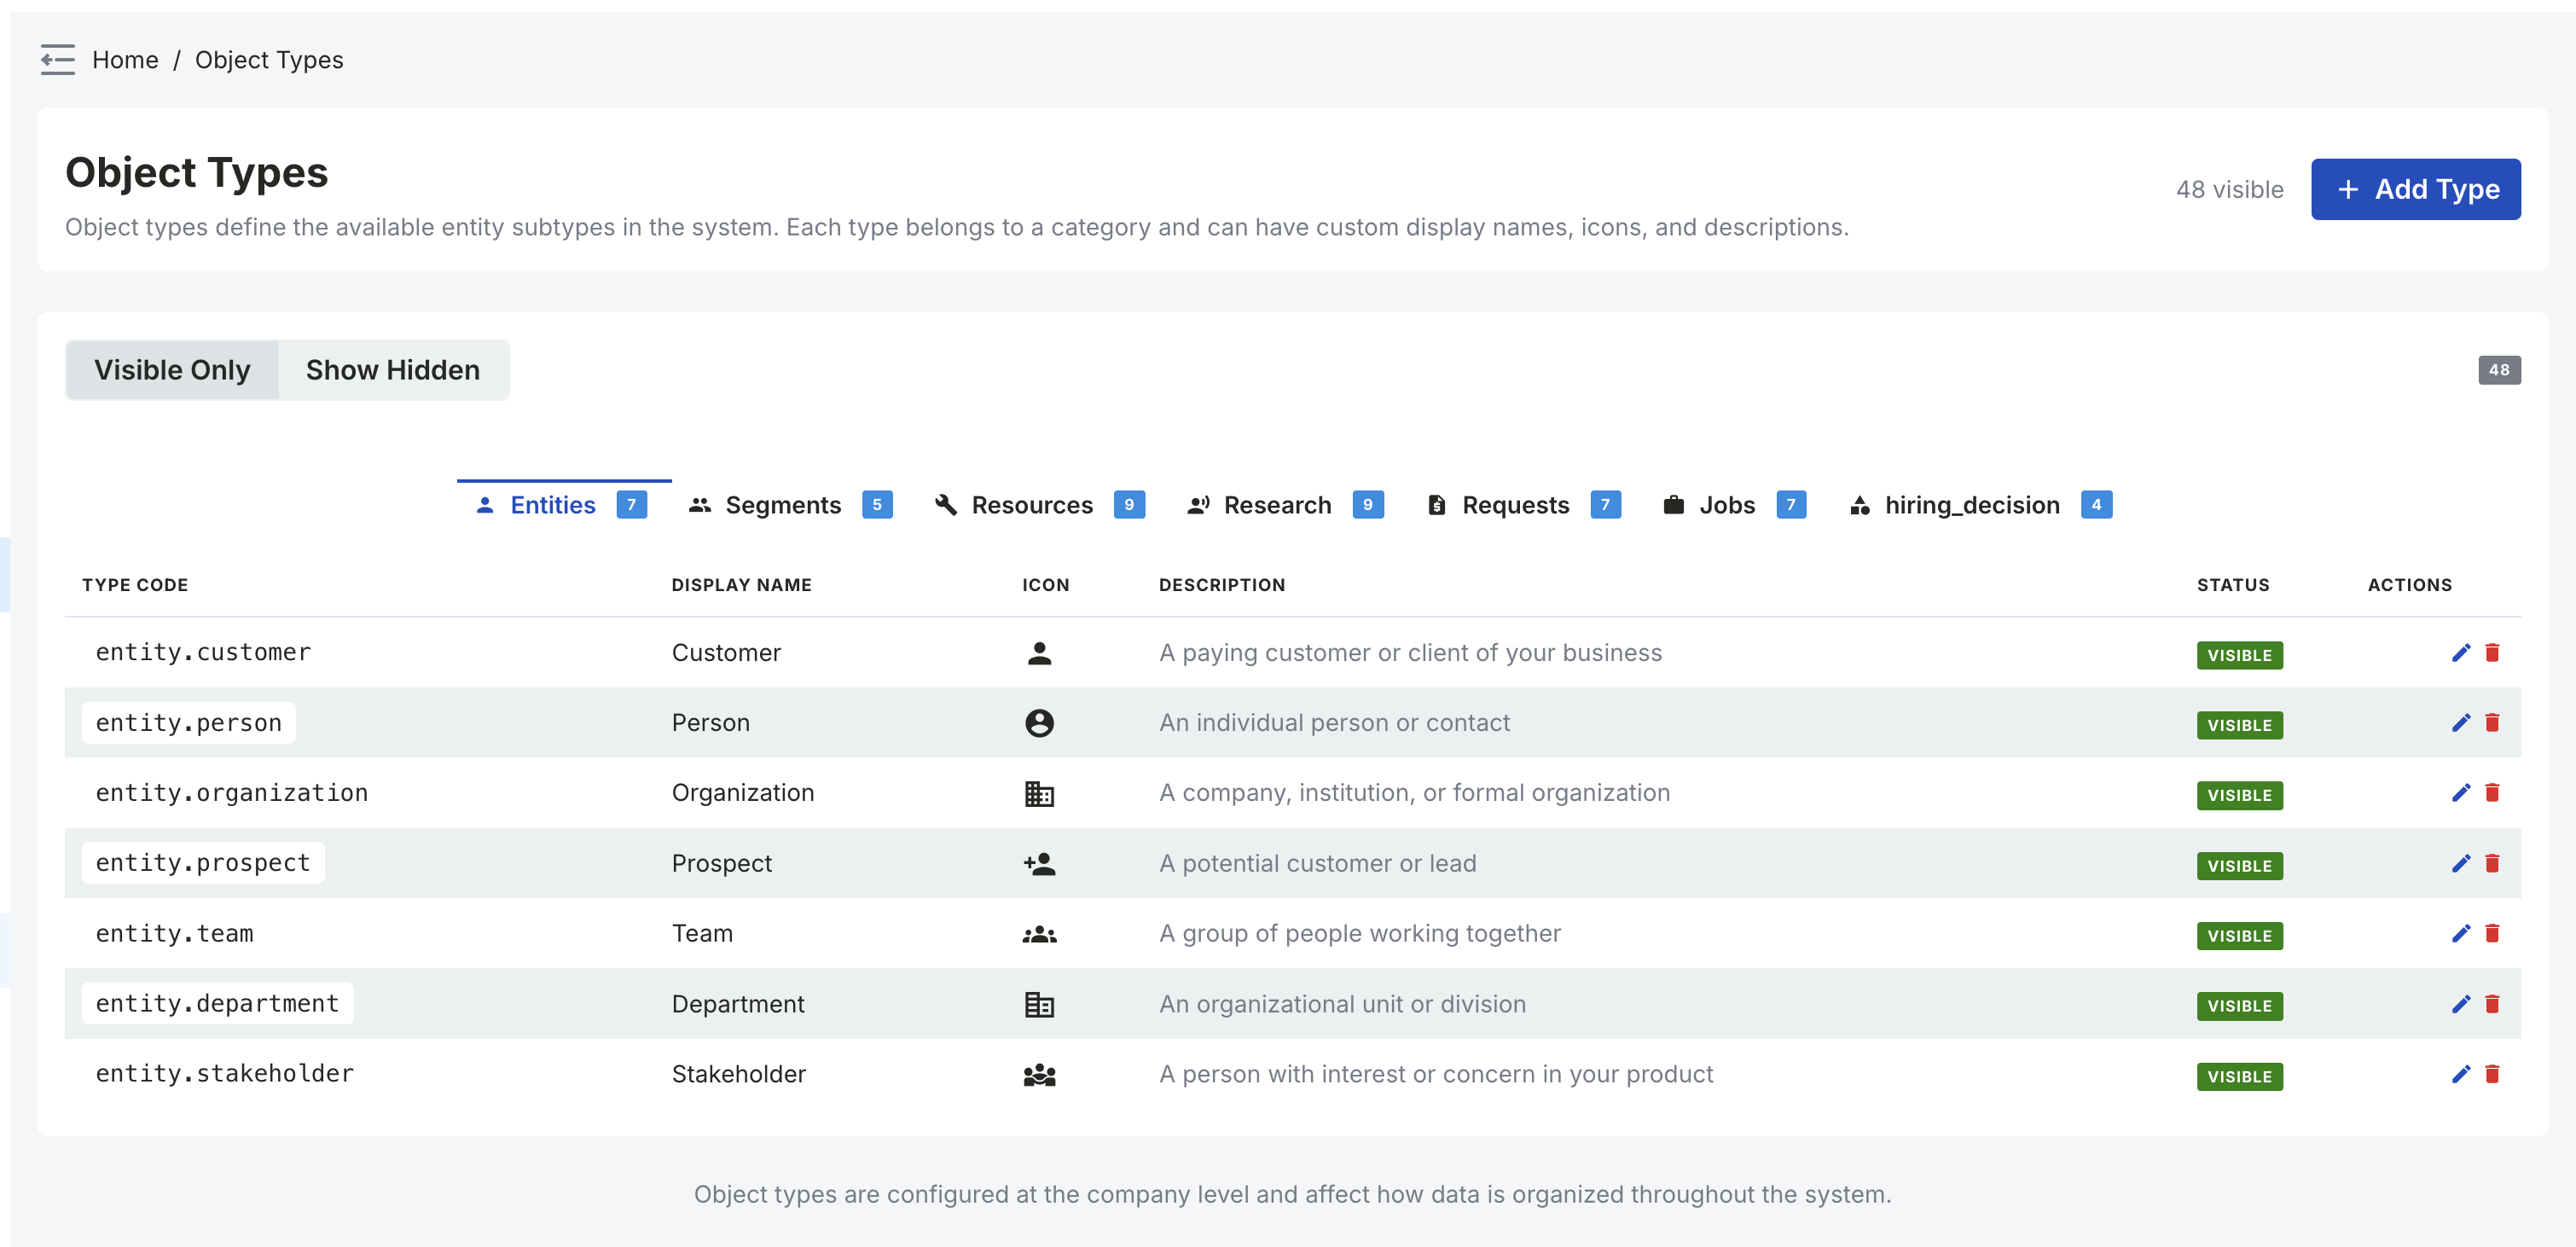
Object Types configuration interface organized by category tabs. Each type shows its color swatch, icon, name, description, and hidden status. (Click to zoom)
Key Features
Categorized Organization
Each kind of record gets its own tab — Segments, Resources, Research, Requests, Jobs, Solutions and more — and its own independent set of types. A tab appears once that category has types to show.
Custom Icons and Colors
Search a curated set of Material Design icons (or name any glyph) and set custom colors to visually distinguish each type. Icons and colors appear in entity browsers, cards, menus, and as color swatches in the type list.
Hide Unused Types
Mark types as hidden to remove them from entity creation dropdowns while preserving existing data. Toggle visibility to show/hide hidden types.
Type Counts
Each category tab shows a badge with the total number of types (visible + hidden) for quick reference.
Category Tabs
Types are scoped to their category, so the same word can safely mean different things in two of them. These four are the ones most teams edit; tabs for Jobs, Solutions, Solution Steps, Hiring Decisions and Goals appear alongside them.
group_work Segment Types
Types for the people and groups you serve (e.g., Customer Profile, Market Segment, Customer, Persona)
science Research Types
Types for customer research (e.g., Interview, Survey, Observation)
assignment Request Types
Types for customer needs and issues (e.g., Feature Request, Bug Report, Customer Request)
inventory_2 Resource Types
Types for what people use to get work done (e.g., Tool, System, Service, Document, Equipment)
Add a Type Without Leaving Your Work
You don't have to open Settings before you can use a type that doesn't exist yet. When you are creating a Segment, a piece of Research, a Request or a Resource, the type picker in the form sits beside an Add type button. Click it and a small dialog opens right on top of the form, already scoped to the category you are working in — you can't accidentally create a Request type while adding a Resource.
Give the new type a code, a name, an icon and a color, then Create. The dialog closes, the new type is added to your catalog, and it is already selected in the form you were filling in — so you carry straight on and save the record. Everything you'd expect from Settings › Object Types applies here too; you have simply reached it from where you needed it.
If the code is already taken
Codes are unique within a category. If you pick one that already exists, the dialog stays open and shows the message right on the code field — "A type with this code already exists in this category." — so you can fix it without losing anything you'd typed. Your half-finished record underneath is untouched.
Choosing an Icon
The Icon field on the object-type form is a searchable selector. Open it and you see the actual glyphs laid out, not just their names — start typing to filter the list ("chart", "person", "bolt"…), and the control itself shows the chosen glyph once you've picked one, so the form previews exactly what will appear on cards and menus.
Search a curated set
The list gathers a broad, hand-picked set of Material Symbols that read well at card size, so you can browse to something suitable instead of guessing icon names.
edit Or name any glyph
Not in the list? Type any Material Symbol name and it's used as-is. And when you edit an existing type whose icon isn't in the curated set, that icon is kept and shown — editing never quietly drops it.
The type picker in entity forms and on the Blueprint now shows each type's glyph beside its name, so the icon you choose here is what people see wherever they pick that type.
Hiding vs Deleting
Type names live on your records, not just in this list. Once a type has been used, how you retire it decides whether those records keep making sense to the people reading them.
Hide — the safe retirement
Hiding stops the type being offered on new records and leaves every record that already has it completely untouched — same name, same icon, still editable. If someone is part-way through editing a record whose type you just hid, their form keeps working. This is what you want almost every time.
Delete — only when unused
Deleting removes the type from your catalogue. The records that used it are not deleted — but they lose the name and icon they were recognised by, and show as "Unknown type" on the Blueprint, in lists and on their own pages. Until a type with that code exists again, saving one of those records from its full edit form is rejected.
It is recoverable — recreate the same code
If a delete turns out to be a mistake, create the type again with the same code. Every affected record gets its name and icon back straight away; nothing has to be re-typed record by record. If you wanted the type gone from the pickers, create it hidden — the records read correctly again while the type stays out of everyone's way. Because the code is what does the matching, it cannot be changed after a type is created.
Before you confirm a delete, RoleDream checks what still uses the type and tells you how many records are affected (and names a few of them). Some categories can't be counted that way — the dialog says so rather than showing a misleading zero, so treat those as "check first". The same count appears in the Used by column of the type list, so you can spot the genuinely unused types at a glance.
How to Access
Access Object Types from Settings → Object Types in the main navigation menu
Best Practices
- checkChoose distinct icons and colors: Use visually different icons and colors for types in the same category to make them easy to distinguish at a glance
- checkAdd descriptions: Write clear descriptions for custom types to help team members understand when to use each one
- checkHide, don't delete: If a type is simply out of use, hide it. Existing records keep their name and icon and stay editable, and you can bring the type back at any time. Reserve deleting for types nothing has ever used
- checkReview regularly: Periodically review your object types and hide those that haven't been used in a while to keep dropdowns clean